Tween Bedroom Makeover | Room Tour | Budget Friendly

Wednesday, July 1, 2020


Our family recently moved into a three bedroom home, which means the kids get to have their own room! Well, sort off - at least Aaliyah, 11, who is the oldest gets to have her own room and the boys share a room. 

The crazy thing about this move is that we moved during the Covid-19 pandemic in the middle of March as stores were closing and people were rushing to the grocery stores. We moved back to our home state of NJ, one of the hardest hit states, which for us meant that stores were closed for months and we couldn't do much to our new home (as far as decorating).

Since we knew the kids were going to be in separate rooms and the second floor rooms in our new bungalow would be too small for bunk bed, we did away with the bunk-bed in Pittsburgh before we came back to NJ. We had no idea stores would be closed for as long as they were, if so we probably would have planned better so the kids mattresses didn't end up on the floor.

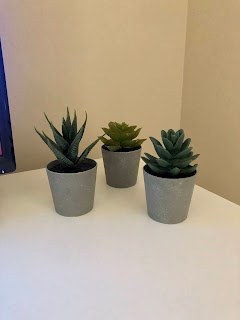
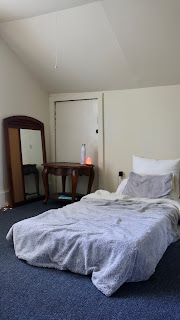
The first room on my list to give a makeover to was Aaliyah's room. Aaliyah is going into the 6th grade and is officially "too old" for the color pink and anything with unicorns. Aaliyah's wish list for this room was plants and pictures. That's literally all she asked for. Here is the before:


Here were a few goals during this makeover:

1. Get a bedframe
2. Desk
3. Re-do dresser
4. Decorate

THE MAKEOVER


Originally I had planned on getting the kids bed frames at Ikea but because they stayed closed for so long and shipping from Ikea is so expensive, we opted for Wayfair instead.

tween room, teenage bedroom makeover, bedroom makeover


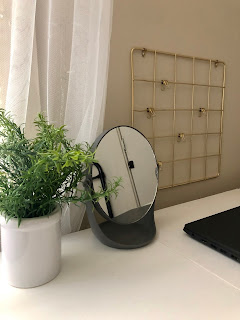
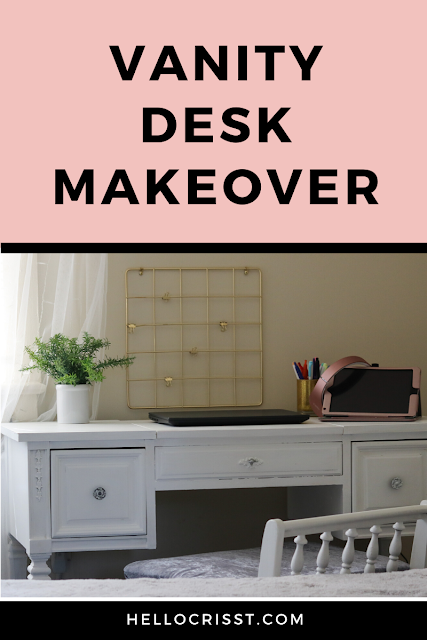
Since we moved during quarantine, the kids began online learning so I wanted Aaliyah to have her own space to sit and be able to do her work.. comfortably. I decided to give my vanity to Aaliyah so she could use as a desk for her online classes and also use it as a dressing table.

tween room, teenage bedroom makeover, bedroom makeover, desk for girls,


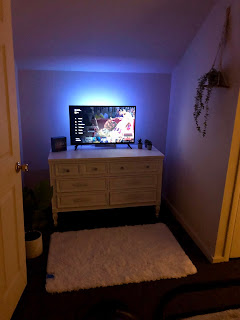
Aaliyah has a dresser that had been waiting for me to paint since 2013 lol so I finally got this done! It got a fresh coat of paint, new knobs, and new pulls. What a difference!

tween room, teenage bedroom makeover, bedroom makeover


Time to Decorate!


tween room, teenage bedroom makeover, bedroom makeover

tween room, teenage bedroom makeover, bedroom makeover

tween room, teenage bedroom makeover, bedroom makeover

tween room, teenage bedroom makeover, bedroom makeover


tween room, teenage bedroom makeover, bedroom makeover

The Final Look

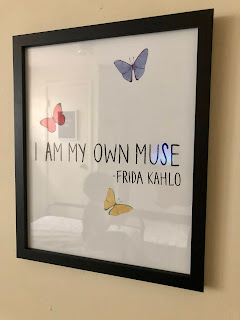
Aaliyah is so happy with how it turned out! It came out so cute. My favorite part is the selfie setup and the lights. What do you think?
Links listed below

tween room, teenage bedroom makeover, bedroom makeover

tween room, teenage bedroom makeover, bedroom makeover

tween room, teenage bedroom makeover, bedroom makeover

tween room, teenage bedroom makeover, bedroom makeover

tween room, teenage bedroom makeover, bedroom makeover


Room Decor: Black Bed Frame: https://go.magik.ly/ml/ya4q/ Bedding: https://goto.target.com/9KD3j (only available in cream currently) Desk Plant: https://goto.target.com/zYL6G Desk Mirror: https://goto.target.com/YZPxB Desk Memo Board (Gold): goto.target.com/V7qLj Affordable Laptop: https://amzn.to/30oTJF0 String Lights: https://amzn.to/2YK4Wi1 Small Command Strips for String Lights: http://amzn.to/2D9KWHC Ikea LILL sheer curtains: http://www.ikea.com/us/en/catalog/products/90111980/ Mirror: https://go.magik.ly/ml/ya4e/ Rug: goto.target.com/54EP3 Floor Plant: goto.target.com/04oDE TV Lights: https://amzn.to/2Vrgkxi Smart Tv: https://amzn.to/38gMBwq Letter Memo Board: https://go.magik.ly/ml/ya5w/ Echo Show: https://amzn.to/2CUMISH Nightstand/Coffee Tables: https://amzn.to/2ZjcB64

Subscribe here

**Most links contain affiliate links in which I receive a small commission. This helps support the channel + blog and helps me as a creator to buy products and supplies to make more videos. Your support is greatly appreciated xo!


How I Painted My Vintage Dresser Without Sanding

Thursday, June 25, 2020


After having this dresser for SEVEN years, I am FINALLY giving this vintage dresser a makeover! The person who gave it to me several years ago said it was a few generations old so this makeover is long over do. 

If you are looking to re-do one of your own furniture pieces stick around because I'll be going over how what products I used to transform this beautiful vintage dresser!


THE PREP

The reason I’m not sanding this is because it’s too thick (I've tried to sand down a similar piece and I'm gonna pass this time around) Also, there's a lot of detail in the wood work and I don't have the tools (or patience lol) to sand down. 


Before I got started.. this dresser needed a SERIOUS cleaning. It had stickers all over it and a few coffee stains marker. So I scraped the stickers off and wiped it down with first with some all purpose spray and then rubbing alcohol.


You’ll notice a few of the original knobs and pulls are missing or broken, so as much as I didn’t want to.. I had to replace them. So before I got started painting, I removed all the hardware. There were also a few decorative pieces on the dresser which I was able to get off with a flathead. 

PAINT

I used a paint and primer in one from Vaspar Signature. The color I used was Ultra White.
I started with very light coats with a brush until I got the finish I was looking for.

I started painting the dresser with a paint brush but I switched to a paint roller because I didn’t like the brush strokes. Plus I kept finding brush hairs in the paint..smh. I’m really happy I went with the paint roller because you can no longer see the brush strokes and the paint came over very smooth!

For a top coat, I used THIS clear water based finishing spray from Mini-Wax.


HARDWARE

For knobs, I went with THESE brass knobs from Hobby Lobby. I really wanted that antique look so I gave them a "rough" coat of paint and wiped some of it off. I love the way they turned out! 

For pulls, I got lucky and found THESE four pulls (Hobby Lobby for the win again) that were already white but had a distressed look!


This is the finished look. I’m very happy with how it turned out. For my next video, I’m going to be sharing how the entire room turned out so be sure to subscribe and give this video a thumbs up. 

If you were to repaint this dresser - what color would you have made it? 


Subscribe here for more to see how the room comes together!

DIY VANITY MAKEOVER PART 2 | Fixing my white vanity that turned yellow

Thursday, June 11, 2020


Back in 2014, you guys seen me re-do THIS vanity! 


2014 | Before first revamp

Fast forward to 2020, I'm giving this vanity another makeover. I decided to give this vanity to my daughter so she can use it as a desk since online classes are a thing now due to Covid-19 but a few things had to happen before I gave it to her. The paint from the previous DIY turned yellow, the vanity chair had discolored, and to make this as a desk I had add a piece of wood to create a table top.


1. Fixing the Yellowing Paint

Because I didn't want to keep adding layers of paint, sanding was necessary.. at least on the top surface. Luckily my dad happen to have an electric sander I could use to make it easier. Maybe I shouldn't say luckily or easier because I made a mistake using this sander. You see, I've never used one before and while "testing" this sander out I didn't check to see what grit paper was already on there until it was too late. It was an 80 grit paper and it caused some scratches. I did my best to fix it by smoothing it out but a lesson was learned here.


For paint I choose a basic white paint from Vaspar Signature in Ultra White (the white paint you grab off the floor before they mix anything.)

After talking to the guy a Lowes I chose the Miniwax Water Based Finishing Spray Clear Semi Gloss. At first I made a mistake and grabbed an oil based finishing coat. The Lowes employee said you want to get a WATER based top coat since my paint was water based because if not it will turn yellow. It was at that moment that I realized 6 years ago I messed up!! The first time I gave this vanity a makeover I used an oil based primer, a water based paint, and a water based finishing coat which is why my vanity ended up turning yellow in certain areas. 

Hardware: I liked the original hardware but I didn’t like how the brass stood out against the white so I painted them and wiped a majority of the paint off to tone down the brassy look.

2. Fixing and Updating the Vanity Chair

Another problem I had was the chair. Although I thought this print was PERFECT since it was white and gray and it matched my daughters bedding, this also had discolored over the last six years. I really wanted to keep it but if you seen my video where I re-did this chair.. I didn’t take off the original fabric off. The original fabric has to be from the 60 or 70’s and because I didn’t take that fabric off it, anytime I would sit in my chair after a shower or it ended up getting wet, it caused whatever was on the original fabric to transfer to the newer fabric. I tried to soak it in some water with detergent for a few hours and it did not budge.

The search for a piece of fabric.. 

So now to find a piece of FABRIC in the middle of a pandemic where everyone is buying fabric to make masks or sell masks. . challenge accepted.

Walmart's fabric aisles were empty. I couldn’t go into Jo-Anns to get a good look at what they had due to them only offering curb-side. It was hard at first because I really don’t know much about fabric and it was just one of those things I wanted to see in person.


So I thought if I were to buy a vanity chair, what would the fabric be? I went to amazon looked up vanity chairs and one of first things I seen was.. velvet.. suede. I was like BINGO! THAT IS IT. I thought this was perfect because when looking for Aaliyah’s bedding, she really wanted soft furry-like bedding and the velvet just reminded me of that. So I was able to find a seller on Amazon that sold grey velvet.

3. VANITY or DESK?

In my last DIY Vanity video I decided to ditch the part that had a mirror. This was only because I knew I was going to be putting a larger mirror on the wall. Now I kinda wish I would have at least kept that piece because it would make the perfect desk for my daughter who since March 14 has been doing online classes due to Covid-19. 

To fix this I was able to find  a 3/4 inch piece of wood at Lowes and have my dad cut it to the exact size to fit this empty space. It was about $8 for a square piece of wood.

The only thing with this wood is that it was really rough around the edges and had gaps that were noticeable so I was able to find wood edging and ironed it on and painted over it. Smooth table top complete!


This vanity is now perfect for my daughter Aaliyah - she can use it not only ask a desk but also a place to do her nails and makeup as she gets older.


If you guys want to see how I re-do her dresser, Subscribe right here because my next video will be how I redo this dresser!

painting furniture pre teen room

Proudly designed by | mlekoshi Playground |