HOW TO SCORE ON FB MARKETPLACE! Facebook Marketplace Finds

Thursday, July 26, 2018

scandinavian furniture, mid century furniture, diy desk,
If you haven't checked FB Marketplace lately, you're missing out because there's plenty of hidden gems on there. I love to do DIY projects and transform old pieces into something beautiful once again, but true to my personal style.

Recently I've been going through Pinterest, specifically searching Scandinavian Living Rooms and Bedrooms and I've been in love with this simplistic modern style. The first thing I think when I see the furniture pieces on these boards is I can find that on FB! This popular mid century style often features items from the 60's, which happens to be furniture people love to just give a way on FB Marketplace. You can even find for free sometimes!

Recently, I've been desperately needing a workspace because let's be honest, how much work do you actually get done on your living room couch with your laptop? Naturally I went to Pinterest to find some inspo to get ideas of a dream workspace. Once I had an idea of what I was looking for I headed over to Facebook Marketplace and I couldn't believe how many desks I found that had great potential for a future desk. Honestly there were a lot of desks that didn't even need work!

diy desk, metal desk, tanker desk, wicker chair, mid century, rustic furniture, scandinavian desk, facebook marketplace


I found a metal desk, similar to an old teachers desk and the seller was quick to respond. I was able to score this desk for only $20! I knew right away I wanted to detail the poles and handles in gold spray paint which I already had at home. The desk did have quite a bit of rust as you can see in the video below, but nothing sandpaper can't fix. I ended up repainting in black which resulted in an overall easy DIY project. I just need to invest in a power drill lol.

<iframe width="560" height="315" src="https://www.youtube.com/embed/R8uso2fT_J0" frameborder="0" allow="autoplay; encrypted-media" allowfullscreen></iframe>

How can you find items on FB Marketplace? The key is to know what you're searching for. Do you have an idea as to what you're looking for? Do you have a specific style you're searching for? Does the item have multiple terms it could be known by? 

For example, I'm currently looking to turn my whole living room into the Mid Century theme but I didn't even know what Mid Century was first until I had started searching for buffets and sideboards. I found an item that a seller had listed as Mid Century and it was a golden search term! Expensive term too.. a lot of items under this search term are expensive so I had to think what if I was a seller who also didn't know what mid century was? What would I list it under? 60's Furniture. This is what I've been doing (reverse engineering) and have finding multiple beautiful pieces. I'm still searching for the "perfect" one that's long enough for a 60 inch tv. 

For the Mid Century/Simplistic theme I've been searching for on FB Marketplace..
Rattan Furn
Cane Furniture
Mid Century
60's
70's 
Sideboards
Buffet Tables
Dressers
Wicker

Here's a gorgeous wicker chair I found for my desk that completes the theme I was going for my desk. 

facebook diy, wicker chairs


Everyday I look for items I can add and save it to my collections. With FB you do have to move fast if you want it though, chances are if you love it.. someone else does to so move quickly! Obviously every one's area will be different but that's what makes this so much fun. Can't wait to see what you find! Tag me: @christinasciblo on IG

<iframe width="560" height="315" src="https://www.youtube.com/embed/zssqCmKCpjI" frameborder="0" allow="autoplay; encrypted-media" allowfullscreen></iframe>


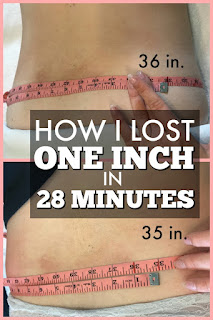
HOW I LOST ONE INCH OFF MY WAIST IN 28 MINUTES - MY CRYOSKIN EXPERIENCE!

Saturday, July 21, 2018

CryoSkin 2.0, CryoSlimming, CryoTonning, Cryo Skin, how to lose belly fat, how to lose back fat, how to lose inches

One inch off my waist in 28 minutes? Yes, it's possible! Let me tell you about my Cryo experience. 
Also check out the YouTube video below to watch how it went!

WHAT'S CRYOSKIN?

CryoSkin is the easiest, painless procedure I've ever tried. CryoSkin uses a wand to apply sub-zero temperatures to an area of the body you would like to lose fat and actually DESTROYS the fat cells. There's many parts of the body it can be used.. like to get rid of the fat around your bra area, hips to get rid of love handles (that's what I did), belly, legs, and the list goes on. Any area a person wants to lose fat, this machine has your back (literally)! Double chin? CryoSkin got you. 

CryoSkin gets rid of that fat cells naturally through the body's lymphatic system which essentially means the fat cells are urinated out. No worries though, you most likely won't even notice. 

HOW?

lose belly fat, how to lose inches off your waist, cryoskin2.0, cryoskin, cryoslimming,

The Cryo tech uses a special wand that first applies 4 minutes of heat to the targeted area and then 24 minutes of cold at 17 degrees F. CryoSlimming uses thermoelectric cooling to freeze the fat to destroy the fat tissue. 

 I didn't experience any extreme discomfort. It was cold but not freezing to the point I was shivering and that particular area felt numb but I didn't feel any type of pain in anyway. It was actually relaxing as you can see in the video below.  

AFTER CRYOSLIMMING

Once the procedure was done the tech immediately measured to see my results. We focused on my hips more in my back area. I wanted to do that area because that's where I gained a lot of weight after having my three children. I instantly lost one inch after the 28 minutes of Cryo! The tech at BlinkStudio where I did my Cryo procedure said that she had one client who had 3 inches after the CryoSlimming procedure. Each person will have unique results.

CRYOTONNING


The CryoSkin 2.0 machine also does what's called CryoToning, which helps with the appearance of cellulite and fine lines. It can be used for the face or any part of the body. I decided to do the back of my legs since I do have cellulite. 

The results were actually surprising. I'm not gonna lie.. I'm usually pretty skeptical when it comes to things claiming to reduce cellulite but the pictures don't lie. You can see how the indentations right below the booty are more subtle and the lower half is more smooth in texture after the CryoTonning.

cryo toning, cryotoning, cryotonning, cryoskin2.0, how to get rid of cellulite, how to get rid of fine lines, how to tone your body,


MY EXPERIENCE WITH CRYO

Overall it was a pleasant experience that I would totally do again. I would like to continue on my hips and eventually move on to my belly since those are my main problem areas. For CryoTonning, I want to try my face since my smile lines are becoming more defined. 

I love how the Cryo procedure was quick and I didn't have to sit there for hours to get the results I was looking for. I was surprised I could immediately feel the difference in my sides and wearing jeans!

Do you have any problem areas you would like to try Cryo on?

How to Clip in Your Hair Extensions | Five Minute Tutorial!

Monday, July 2, 2018


clip in hair extension placements, where to place hair extensions, yelloow hair extensions, how to hair extensions, how to clip in hair extensions, hypothyroidism hair,

When I first got my hair extensions, I had a 10 piece set and no idea what order to put each clip in. Where do I begin? There's all these different clips and sizes of wefts and I had no idea where to put each of them. 

I created this tutorial (and video below) to help those who need help where to place each hair extension weft. 

Let's start out by combing and in this case flat ironing our hair (if you're interested in a hair extension curling video, let me know. I got chuuu). The flat iron I use is by Herstyler found here.

Now it's time to part our hair. If you want to be precise with this step you can use a comb to get an even straight line. I just use my finger and a hair clip (way easier and faster than using a hair tie).

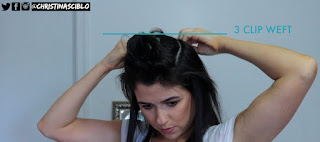
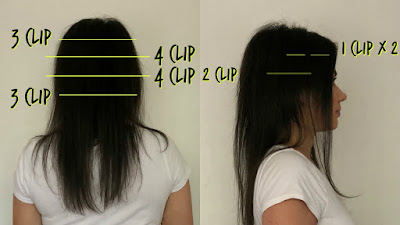
 The first part I do along the base of my neck and use a 3 clip weft. I leave enough hair for the hair extensions to clip to. The clips on hair extensions are pretty easy to use. To open the hair extension clip you want to bend the clip and it should open right away. To close the clip you bend the clip the opposite way. 

clip in hair extension placements, where to place hair extensions, yelloow hair extensions, how to hair extensions, how to clip in hair extensions


Tip: To get the extensions to hold better, I move each clip in small circular motions to tease the hair a little bit. Another option would be to back comb your hair or tease with a comb.  Back combing does cause a little bit of damage to your hair so this part is up to you.

Next section: 
Part hair at ears length and repeat above steps. 
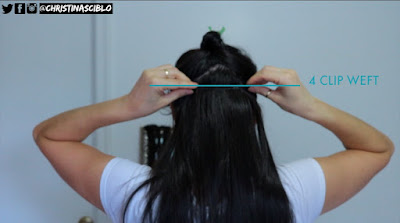
At this point my head is wider, so I used a 4 clip weft.

clip in hair extension placements, where to place hair extensions, yelloow hair extensions, how to hair extensions, how to clip in hair extensions

Next section:
Part hair again around the area eyebrows.
This is still the widest point of my head so I used a 4 clip weft. 
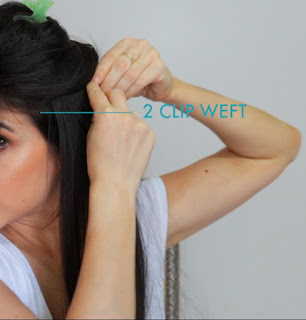
Also I added 2 clip weft on each side of my head at this part.

clip in hair extension placements, where to place hair extensions, yelloow hair extensions, how to hair extensions, how to clip in hair extensions

clip in hair extension placements, where to place hair extensions, yelloow hair extensions, how to hair extensions, how to clip in hair extensions


Next Section: Crown of Head.
You don't want to go too high with hair extensions because you still want a layer of hair to hide the clips. If you feel as though this doesn't work for you, feel free to skip or make your lower parts closer together. 

clip in hair extension placements, where to place hair extensions, yelloow hair extensions, how to hair extensions, how to clip in hair extensions


Lastly:
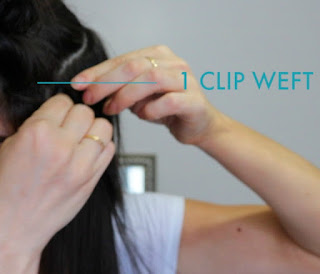
1 clip wefts - Think of these like fillers. I like to use them around my face since that's where my hair is the thinnest. Add all 4 or 1-2 depending on how much volume you want to add. 

clip in hair extension placements, where to place hair extensions, yelloow hair extensions, how to hair extensions, how to clip in hair extensions

Here's an overall look on the placements of each weft: 

clip in hair extension placements, where to place hair extensions, yelloow hair extensions, how to hair extensions, how to clip in hair extensions

The hair extensions used here are by Yelloow. Their 10 piece clip in set retail for $97.
My color is ebony and these extensions are 22' long. You can find them here.

Here is a quick 5 minute tutorial:

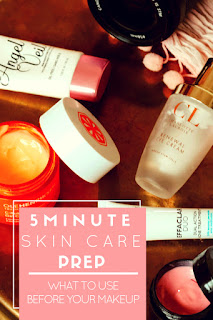
5 Minute Skin Care Prep - What to Use BEFORE You Apply Your Makeup

Tuesday, June 26, 2018

Skin Care Prep, What to use before you apply makeup, pre makeup skin care, how to get radiant dewy skin

When it comes to applying your makeup, skin care is very important because it's the base makeup sits on. Finding products that work for your skin will overall help your makeup last throughout the day and also affect how it appears on your skin. 

LIP MASK

Best Lip Treatment For Dry Cracked Lips
Crusty lips or smooth lips? We all want our lipsticks to apply super smooth because who likes cracked lips? Find a good lip balm or hey, even a lip mask will do the trick. Personally, I have very dry lips all throughout the year. I have found a lip mask that I apply first thing when starting my skin care/makeup routine. Applying your preferred lip treatment first will allow time for the product to soak into your lips resulting in smooth lips for your lipstick! (PS if you're looking for the key to applying liquid lipstick, check out this video)


EYE CREAM

Eye Creams for Dry Under EyesDoes your concealer or powder tend to crease under your eyes? Have you tried applying an eye cream? No matter your age, applying an eye cream could make a difference in your makeup application. I've had dry under eyes since I was 22 years old (at least that's when I noticed LOL) and I've been applying eye cream under my eyes ever since. For the past year I've been using this one by Charolette Lacroix but I'm currently on a hunt for a new one since I barely have any left as you can see in the video below lol. 

SPOT TREATMENT

What to put on top of blemishes, how to make pimples go awayNow of course this will vary from person to person, but there is a lot of us out there that break out during THAT time of the month or if you're like me, I have more breakouts in my 20's than I ever did in my teens. 

Applying a spot treatment helps treat existing blemishes that have already surfaced. The most effective over the counter spot treatments are ones that contain benzoyl peroxide.

SERUM
face serums for dry skin

Serums are good for your problem areas. For example does your skin need more moisture? Do you want to focus on skin aging? Everyone has their own skin concerns so finding a serum that focuses on that is key. For example, lately I've been using an acne wash that has been drying out my skin. Therefore I need more moisture in skin and have found using a serum that focuses on moisturizing my skin is best for me at this moment. The one I've been using is by H2O Beauty.

MOISTURIZER

The Secret to Radiant Glowy Skin,This is personally my favorite part of my skin care routine. It's so refreshing to me and LOVE how my skin feels after applying my moisturizer. Again, finding a moisturizer that fits your needs is best. Are you more oily or more dry? 

Lately I've been using Ole Henriksons C Rush Brightening Cream Gel. It smells amazing and it gives my skin the perfect glow. I feel so refreshed after using it. Another one of my fav's is H2O PLUS Face Oasis, it's been a favorite of mine for years. It has a gel like consistency that feels very cooling to the skin and is also very hydrating.

PRIMER

Drug Store Makeup Primers for Smooth Skin, Blurring Primers, Makeup Primers,Do want to mattify your skin or do you want to smooth out your imperfections? Applying a mattifying primer will help your skin from looking oily throughout the day. I like a primer that smooths out the skin like NYX's Angel Veil. It smooths my fine lines in my forehead and large pores around my nose. NYX's Angel Veil really gets the job done for being a drug store product. 


What are your key skin care products? What are your fav's? What do you feel like is missing? Check out this YouTube video on my 5 Minute Skin Care Prep:


How to Self Tan in 2018. Tips and Tricks. From Pasty to Bronze!

Tuesday, June 19, 2018

1. EXFOLIATE

Exfoliating the skin before self tanning is a step that is SO important. It helps the tanner adhere to the skin best and reduces the tanner getting blotchy and streaky. 

what to use to exfoliate skin

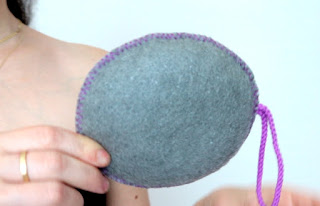
I use an exfoliator pad I got from Target. It's textured but not too abrasive for the skin. I use this ALL over my body to really make sure the tanner has a smooth surface to stick too. When exfoliating I show a lot of love to my knees, elbows, and feet since self tanner tends to stick to those areas the most. I wait to exfoliate until the END of my shower so my skin has softened up.

how to exfoliate, how to exfoliate skin, how to prep skin for self tanner


Since I tan my face, I do exfoliate my face as well. Instead of using an exfoliator pad, I just an exfoliator wash for my face that has beads to remove all the dead skin from my face and neck as well. The one I used from the above video is from Juice Beauty. 

2. SHAVE

Shaving is a step I like to do the night before I know I'm going to be self tanning. Since I've been self tanning for YEARS, I know that if I apply self tanner immediately after I shave the tanner tends to sink in to the old hair follicles creating dark dots all over my legs (not cute haha). I shave the night before to minimize the appearance of all those dark dots on my legs. For super smooth skin, I always shave with conditioner, yes hair conditioner. It doesn't have to be anything expensive, a cheap Suave conditioner does the trick! 

3. PREP ROUGH AREAS

do you use lotion before self tanner, what lotion to use for self tanning,

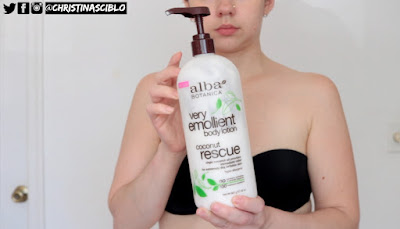
I ONLY apply lotion to my hands, feet, elbows and, knees. Showing special attention to these areas helps the tanner from getting dark and prevents it from being obvious you have self tanner on. I use Alba Botanica Coconut Rescue found at Target. It's important to make sure the lotion is completely absorbed into the skin before moving on to applying self tanner. Also use a lotion that isn't oily to avoid streaking. 


4. APPLY SELF TANNER

self tanning application, best mitt for self tanning application, free tanning mitt with purchase

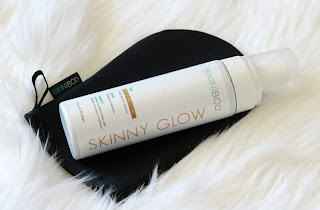
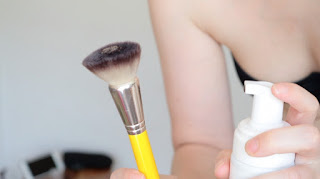
I use two things when I apply my self tanner. A velvet tanning mitt and a foundation brush. The tanning mitt helps blend out the lines and also prevents your hands from getting dark. The brush helps smaller areas and areas that tend to crease. 

Then I apply about 2-3 pumps for each area that I work in. Also, I work in one small area at a time. I use circular motions, slightly overlapping the last area I worked in (think of vacuuming? lol).  I like using a tanner that has a color guard so I can see where I'm applying the product.

best affordable tanner, best natural self tanner, tanner with guarana,


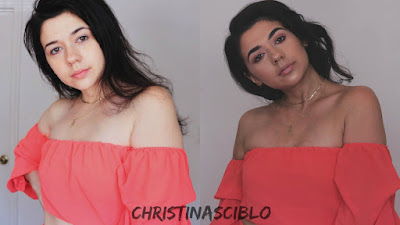
The product I'm using here is called Skinny Glow by Bikini Bod. I like this particular tanner because it gives me a deep very natural tan. It doesn't make me the slightest bit orange and it doesn't scream "I HAVE TANNER ON!" (thanks to my tanning skills too of course LOL). It's one of the best self tanners I've tried and for the price you won't find anything better. Also, Skinny Glow contains Guarana and Caffeine to help tone problem areas and help reduce cellulite.

Use code bbchristinas for 10% off. http://bit.ly/skinnyglowbikinibod


5. APPLY SELF TANNER TO BACK

sunless tanning back, self tan back, how to self tan your back,

Since I don't always have someone to tan my back, I have found that using a towel is my best friend. No special gadgets, just a good ole towel (maybe an old one is best). I apply the tanner right in the middle of the towel and just move back and forth until I can feel theres no more, then repeat. This is very easy and very effective! 

6. APPLY SELF TANNER TO FACE

self tanning face, sunless tanning face, self tanning hands, self tanning feet, self tanning elbows

how to self tan face, how to tan face, what do you use to self tan your face

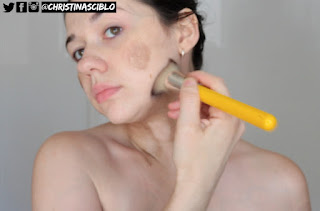
Here's where the foundation brush comes in. I apply 1 pump to the brush and work in small areas at a time until the self tanner is blended in. Using a foundation brush is great for your face, neck, ears, behind your ears, knuckles, ankles, feet and toes. All small areas that are hard to get to. When it comes to my knuclkes and any areas where there's folds, I stretch out that area so it's not white when I bend my fingers. The foundation brush I'm using is a 957 Foundation Brush from Bdellium Tools.

7. WAIT 3 HOURS

The waiting game. Honestly I like to wait 8 hours. I apply in the morning, then rinse off before bed. It really depends on the tanner. For this specific tanner I use, you only have to wait 3 hours for optimal results. 

self tanning tips and tricks, self tanning before and after pics, how to self tan, sunless tanning,


To keep your tan on the longest, it's best to not exfoliate or scrub your skin until your ready to reapply or remove your tan all together. Self tanner typically lasts 5-7 days before reapplication.

If you have any questions, feel free to ask! 

Subscribe to my YouTube channel


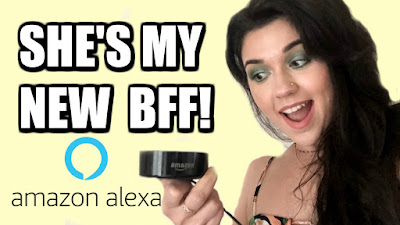
5 Reasons to Make Alexa/Amazon Echo Dot Your BFF

Wednesday, June 6, 2018


Products Mentioned in video: 
Amazon Echo Dot: https://amzn.to/2LswYVR
Amazon Echo Show: https://amzn.to/2xQbQa4
Alexa Smart Plugs (for coffee pot and lights): https://amzn.to/2Jg8h2q
*Please note to use Drop-In feature you need at least two Amazon Echo devices.

Ever since I bought my Echo Dot from Amazon, I've been obsessed. It became my new toy and I wanted to know every thing I could possibly do with Alexa.

I'm not gonna lie, when I first ordered my Echo Dot.. I thought there could be a possibility that it would be one of those things that sits there and collects dust but NOPE! The Echo Dot definitely blew away my expectations and I talk with Alexa every.single.day! I love my echo dot enough that I made a video about how she became my BFF! 

1. Alexa is always there to make sure you’re on time! 
Alexa makes sure you never over cook your pasta
Alexa help’s you while your masking - face masks or hair masks!
Alexa makes sure your kids don't use all the hot water by setting a timer!
Alexa helps keep cleaning to one hour one day with a timer
Alexa makes sure your never over sleep with her cool alarm.
2. Your shopping bff! Who doesn’t like a shopping buddy?
Alexa is always there to add stuff to your lists! Good bye pen and paper. Once you get to the store you can take Alexa with you via the Alexa App and view your shopping list.
Alexa will help you shop Amazon.com without having to look at a screen!
3. Let’s be honest. I’m super forgetful and never remember anything (mom brain) but I know Alexa always has my back!
Alexa is there when your in the shower and you get that random idea! "Hey Alexa take meat out the freezer"
Tell Alexa to remind you of appt that you know you need to make - that way you don't forget.
Anyone else always forget when their kids have a half day of school? No more surpises day of half days lol!
4. Like a true BFF, Alexa always lends a helping hand!
Alexa Turn on the coffee pot
Alexa what’s on my calendar today
Alexa turn on the light
Alexa start my day
Alexa turn on the music
5. Your personal messenger.. even in your own house

Never raise your voice - Drop In the Kids in a different room. That way you never have to scream bloody murder up the stairs.
Alexa call husband
Alexa text mom

echo dot, echo dot show, alexa bff, alexa echo dot, amazon alexa, amazon alexa echo dot,


❥ More Videos:
⇢ Most Recent Upload
https://goo.gl/9oQtxC
⇢ Morning Routine - 3 Kids and Makeup
https://youtu.be/cT45uNoevyc
⇢What’s in my Tory Burch Bag - Switching from Old to New!
https://youtu.be/EjbKsKBk-0M

♥ White Lotus Boutique♥ Use code CS15 for 15% off
http://bit.ly/whitelotusboutique
♥Grove Collaborative ♥  Free Mrs. Meyer’s Gift Set:
http://bit.ly/grovecollaborativemeyers
♥ Sigma Brushes♥ - Use code “Sigma2018” for 10% off
http://bit.ly/29imASx
♥ Bdellium Tools♥  Use Code “hellocrisst” for 10% off
http://bit.ly/1NQqdNn
♥ Lash Kitty ♥ Use code “christinasciblo” for 10% off
http://bit.ly/lashkittyamina
♥ Loving Tan ♥ Use code “hellocrisst" for a free application glove
https://www.lovingtan.com

❥SOCIAL MEDIA
♥ I N S T A G R A M: @ChristinaSciblo https://instagram.com/christinasciblo
♥ S N A P C H A T: hellocrisst
♥ T W I T T E R: @ChristinaSciblo http://twitter.com/christinasciblo
♥ F A C E B O O K: "LIKE" my page http://www.facebook.com/christinasciblo
♥ P I N T E R E S T http://www.pinterest.com/hellocrisst
♥ B L O G: http://www.hellocrisst.com

❥ Business Inquiries/Product Review:
Christina Sciblo
Email: christina@christinasciblo.com

❥ MUSIC/CAMERA/EDITING:
Camera: Canon T6i http://amzn.to/1W37GjD
Diva Lights:  http://amzn.to/2cZUGee
Other Lights: http://amzn.to/2cVWreP
Tools I use: https://www.tubebuddy.com/hellocrisst
Edit: FCP
Music by: Spring In My Step (YouTube Creator Studio) 

The "Healthy" Foundation - Physician Formula

Monday, April 23, 2018


Finally trying the new Physician Formula Healthy Foundation! Honestly the last time I ever bought something Physician Formula was in 7th grade when their bronzer/brush/highlighters were really popular. I wonder if they still have them? Anyway.. here’s the review on the new Physician Formula “The Healthy Foundation.” Like & Subscribe https://goo.gl/TzPvu

The Healthy Foundation:

I used shade LN3 but switching to MN3


Physician Formula The Healthy Foundation LN3, The Healthy Foundation, Physician Formula, Drugstore foundation, Drugstore Foundation 2018,

Picture from Physician Formula website. 


*Links do contain affiliate links


Kate Spade Clutch/Crossbody - Greer

Friday, April 20, 2018


Kate Spade Greer Unboxing
Color: Guava

Where can you buy this specific bag?
Kate Spade Outlet Stores
If you would like to purchase online, here's the only one I could find (due to it being an outlet item):

kate spade, cross body, spring clutch, spring cross body bag, summer clutch, summer cross body,

kate spade, cross body, spring clutch, spring cross body bag, summer clutch, summer cross body,

kate spade, cross body, spring clutch, spring cross body bag, summer clutch, summer cross body,

kate spade, cross body, spring clutch, spring cross body bag, summer clutch, summer cross body, outlet bags


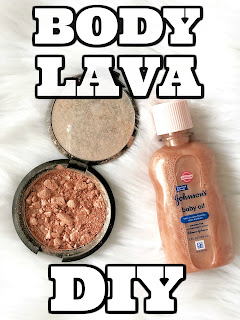
FENTY BODY LAVA DUPES! DIY BODY ILLUMINATOR

Tuesday, April 17, 2018


Subscribe for more videos: https://goo.gl/TzPvuZ

Want a beautiful glow to your skin this summer? Don't want to pay $59 for the new Fenty Body Lava? Here are 2 dupes you can try:

1. THE BABY OIL DUPE

Body lava baby oil dupe, diy body illuminator, diy summer glowy skin, fenty body lava dupe, who needs clothes dupe


What you'll need:
Any shimmer eye shadow/highlighter color of your choice
Baby Oil (Travel Size is best)

This hack is great if you want glow and shine. The baby oil is really going to give you a beautiful shine with the highlighter inside, but keep in mind you will also have the oily feeling to the skin. 

All you have to do is crush up the highlighter/eyeshadow and combine with the baby oil and shake. 

Few tips:
Keep in mind you'll have to use a lot of highlighter. I used an old broken one. Use shadows you don't 
Take out some oil if you want a more pigmented body illuminator
Play with highlighters/eyeshadows. Because I'm more fair, I wish I would have used a darker highlighter.

2. THE NIVEA AFTER SHAVE BALM HACK

What you'll need:
Any shimmer eye shadow/highlighter color of your choice
Nivea After Shave Balm

For a more pigmented body illuminator, I recommend only using a little bit of Nivea After Shave Balm. Start with a little and add as you get your desired color. 


rihanna body lava dupe, body lava dupe, fenty body lava, diy body illumminator, diy body highlighter, summer glow,

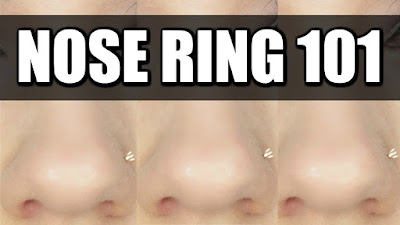
Nose Ring 101 - How To Find the Perfect Nose Ring

Thursday, March 22, 2018


Before you go shopping for a new nose ring, let me give you the break down of the many different styles because chances are the shop stylist is going to ask you which kind of nose ring you prefer and your just going to standing there like uhhhh...

Just keep in mind, each style is different and what might work for some might not work for others. It's all trial and error.

Corkscrews - Most common nose ring to be pierced with. Pros: Doesn’t come out easily. Cons: Hangs out of nose. Difficult to put in.

Bone - Straight nose ring with a tiny ball at the end. (My Personal Favorite) Pros: Doesn’t come out easily. Great if you don’t plan on changing. Cons: Can be painful putting in at first. If you were pierced with a thicker gauge it may fall out easily

Bend to Fit Nose Rings - Straight nose ring that you can bend to fit your exact nose. Pros: Flexible, Customize to your nose, great for those with a thicker nose. Cons: I have yet to find any..

L shape - Nose ring that has a slight bend in it. Pros: Easily take in and out Cons: Comes out easier

Hoops - Circle nose ring Pros: Gives nose piercing room to breath Cons: Hoops are curved. Can be difficult to put in for a newbie.

Have a bump on your nose? Try H2Ocean: http://amzn.to/2E2MwgH

Please be advised that I’m a Team Member of Signet Jewelers and my views do not represent Signet.

Nose Ring 101, How to find the right nose ring, gold nose rings, different types of nose rings, diamond nose rings, l shape nose rings, corkscrew nose rings, bone nose rings


DIY LIGHT WALL! How To Make Your Bedroom Feel Larger with Lights!

Thursday, March 22, 2018


Because my headboard is very tall, it started to make my room feel very small and I needed a new way to make my bedroom feel larger. I've also always wanted to put fairy lights in my bedroom so that gave me the idea to use the fairy lights to elongate my headboard and make the room feel larger and not so cramped.

When you watch the video, you'll see that originally I had my curtain rod right above the window which again just made the room feel very small. I decided to raise the rod to about an inch away from the ceiling, which instantly made the room feel larger. 

I really scored big with these lights I found on Amazon. (You know it's a hit or a miss on there.) They're good to go as soon as you take them out the box! All you do is attached to the command hooks to the wall and you're good to go. Think of them like the icicle lights but for your bedroom and longer! You don't have to loop them up and down if you don't want to (I did so there wasn't wasted lights hiding behind my headboard).

This DIY was super quick and easy and I love how it looks at night. They act like a nightlight in a way. I can still see what I need without turning on the light and waking up my one year old who still sleeps in our room. Watch the video above to see how it's done!

Here's what I used: 
Clear Small Command Hooks: http://amzn.to/2D9KWHC
String Lights for your Bedroom: http://amzn.to/2oRCPvb
Curtain Rod (measure first): http://amzn.to/2oNAv8w
Power drill (you’ll need one of these unless you wanna do it by hand like I did): http://amzn.to/2FnmQuX

how to make your bedroom more romantic, lights for bedroom, light wall, light headboard, fairy lights for bedroom, where to buy fairy lights

Proudly designed by | mlekoshi Playground |